
When a problem with the client occurs, it can be very helpful to create a debug file for it. This clarifies the issue and allows the program’s developers to find or create a solution to that problem.
Step 1:
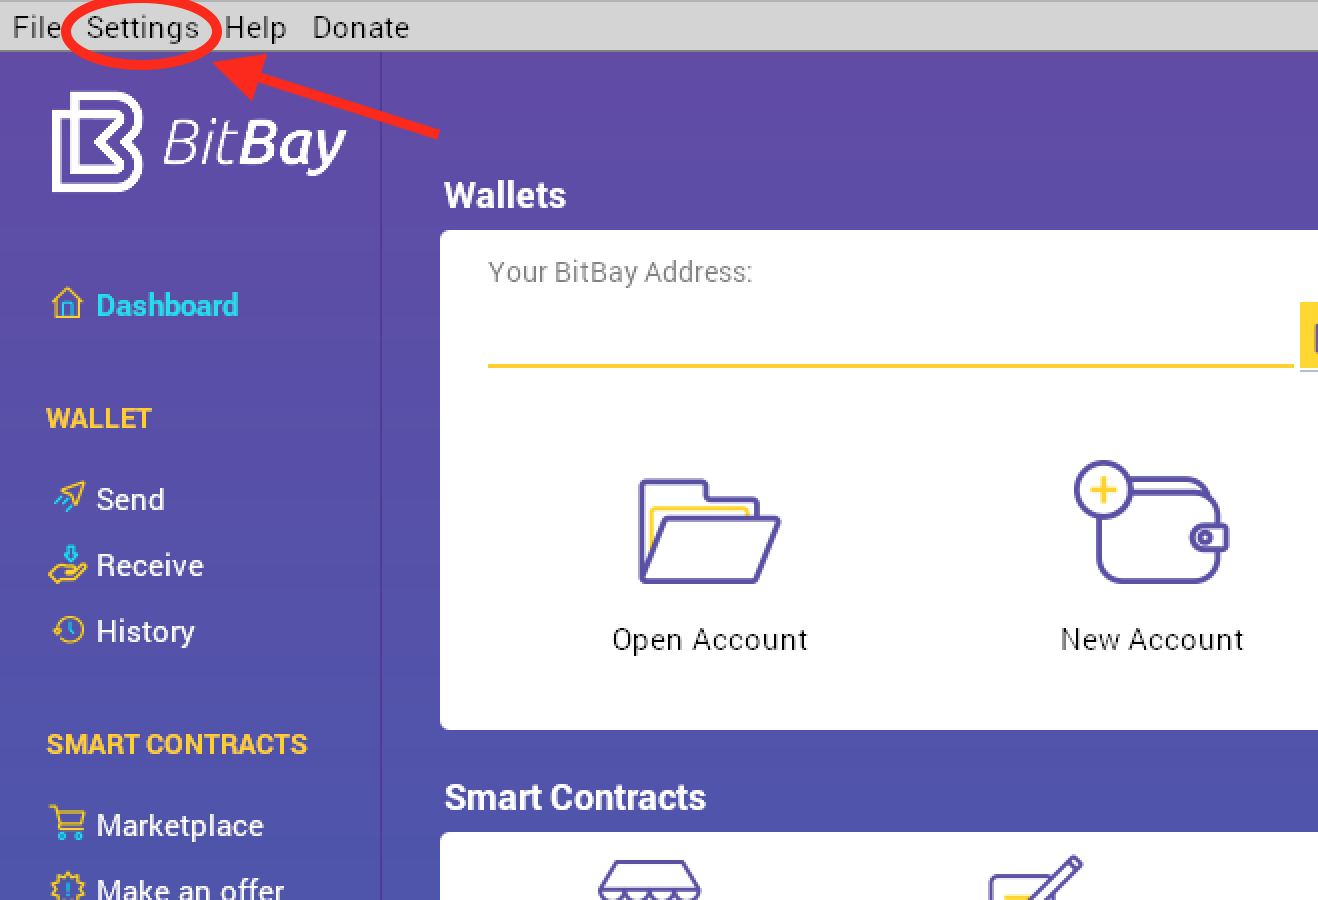
First, you must activate the debugger within the client. To do this, go to the client homepage and click settings > general settings.
Next, click the Create Debug File on Exit box.

Step 2:
Next, you must restart the client for the changes to take effect. Simply close out of BitBay, wait a few moments for it to properly shut down, then re-open it.
Step 3:
Now that the debugger is activated, you must recreate the original problem that was encountered. Make sure the client is 100% synced after reopening, then follow the original steps that were taken leading up to the problem you first encountered.
Step 4:
Once you have successfully recreated the problem, you can close out of the client to create the debug.txt and debug.log files.
Step 5:
Now that the debug.txt and debug.log files have been created, you can find them here:
debug.txt:
– Windows default location c:\bitbay folder
– MAC default location Applications > BitBay (right click) > Show package contents > Drive C > BitBay
debug.log:
– Windows default location c:\bitbay\bitbaydata folder
– MAC default location Applications > BitBay (right click) > Show package contents > Drive C > BitBay > bitbaydata
NOTES
You may be wondering, how are the debug.txt and debug.log files different from each other?
Debug.txt is a file that contains contains information on any bugs that are affecting the BitBay client. This file is solely related to the software itself, and not the blockchain.
Debug.log: contains information that is specifically related to the blockchain, such as syncing, sending/receiving transactions, and staking.
With both of these files, the developers can see what sort of bugs are occurring, and fix them.